Things have been going very slow on the house. Much slower than planned, mainly because we are still waiting on the planning application, which we expected to be through at the end of March. It's basically through, just waiting on some formalities and paperwork, so we're in the process of finalising working plans to get quotes.
In the meantime, I've been doing more clearance work in the living room, slaughter room (I really should start calling it the kitchen now) and one of the bedrooms on the first floor.
In the
last post, I showed the first steps in the living room, removing the partition wall and revealing the oak beam which was cracked. Since then, an engineer paid us a visit (well, we'll be paying him) and said it could either be replaced with a steel beam, or can be left
in situ, though a post would have to remain to support it. I'm assuming replacing it with a steel beam with be costly, although we won't know for sure how it might be done until I take down the ceiling.
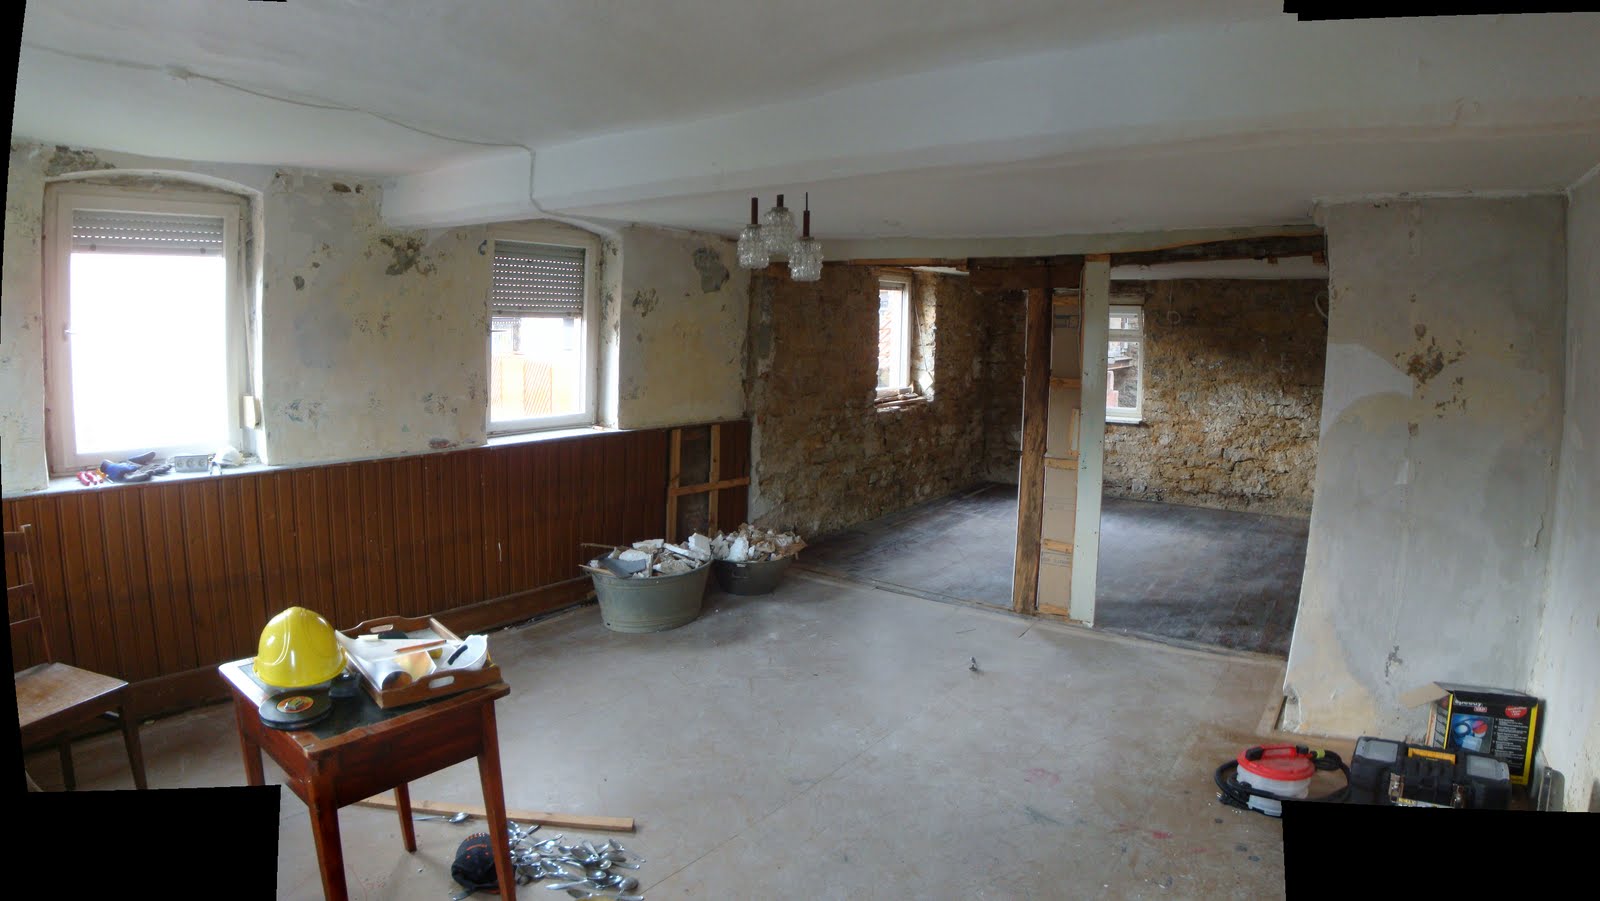
Dry lining removal continued over last week (I had an enforced break from heavy work after falling and bruising my spine a few weeks ago, which also delayed our own works), so the walls in the living room are now plasterboard-free. You can do a before and after using the
first living room post.
 |
| Living room, April 2011. |

In the room to the rear, I was surprised to find bare stone walls behind the plasterboard. In all other areas there was still old plaster with layer upon layer of old paint, often with wonderful stencilled patterns still remaining. There are still traces of clay-based plaster between the stones, so presumably plaster was removed before sticking the Styrofoam-insulated plasterboard onto the walls. More on that below.
I like the idea of leaving one of these walls exposed, cleaning it up and re-pointing the stones. The back wall will be insulated from the outside, but unfortunately the west wall (left in the photo to the right) will be insulated from the inside.
The opposite wall was clearly scoured before the plasterboard was "glued" to the wall with blobs of plaster. Several layers of paint and thin plaster have been exposed, with some of the earliest showing as turquoise, with brown, geometric flowers stencilled on. The brighter patch on the right, as seen in the photo to the left, is not wallpaper, it's actually a white or cream base with a stencilled pattern. At the top left, the underlying bricks are exposed, which don't exactly look ancient. This part of the wall is thinner in plan (see the floor plan at the top of this post), and it is possible that there was formerly a door here that was later bricked up.
 |
| Section of the fuchsia pattern. |
In the southern part of the overall living room (the large room before the partition was taken down), there was no plasterboard, so once the wallpaper was removed, the old paints were exposed. There are six or more layers, probably, thogh only the most recent can be seen to any great extent, the rest are only exposed in small, enticing sections. As it happens, I think the latest one was very pretty and delicate, being a stencil of what looks like fuchsia in five colours. This was rendered in repeating patterns, spaced about 80cm apart, with geometric patterns of circles of radiating lozenges and wavy lines between.
 |
| The fuchsia stencil. |
Next step in this room, take down the plasterboard ceilings to make sure there are no surprises hidden above.

 In the room to the rear, I was surprised to find bare stone walls behind the plasterboard. In all other areas there was still old plaster with layer upon layer of old paint, often with wonderful stencilled patterns still remaining. There are still traces of clay-based plaster between the stones, so presumably plaster was removed before sticking the Styrofoam-insulated plasterboard onto the walls. More on that below.


Your blog provided us with valuable information to work with. Each & every tips of your post are awesome. Thanks a lot for sharing. Keep blogging..
ReplyDeleteChandeliers