Saturday 28 January 2012

The domino effect

The old beam in the living room, which was cracked and beyond repair, sagged in the middle, so was propped up be a post. Of course, this meant that the floor above must have sank, so at some stage, the previous occupants levelled it out. By inserting a new, straight beam, the domino effect was that we had a bulge in the middle of the floor above, in the region of 5 to 7cm high. Today was time to lift the floor to level it out.
Before all the big work started. Looks innocent, eh?

The "bulge" can be seen in profile. And the glass wool underneath...
Looking north into the room after the first steps
Originally, we'd thought to leave this floor as is, since the boards were relatively new and serviceable. However, removing well-nailed tongue and grooved boards wasn't so easy, so there were casualties to the grooves in some cases. Added to that what was under the boards, I think we'll get new floor boards.

The boards were resting on runners which had been jacked up by several centimetres of packing near the centre of the room. Between these was layers of old lime plaster and rubble, dumped on top of the oak beams and clay filling which formed the base layer. On top of all the crud was matted glass wool insulation and, well, actual crud, in the form of mouse and rat droppings. Lots of it! The critters had fashioned tunnels through the insulation, so it was like a little mouse town, with well defined public toilets.
Mouse runs. And that's shit in the lower left corner.
Glass wool removed, packing and rubble visible.
It was quite a bit of work to remove the boards, bag the glass wool, remove the runners (that part was much harder than I expected!), then shovel up the rubble and dispose of all of that till it was in a clean state. Well, it took a full day. Now we've a clean room, and we'll be able to gain a valuable few cm of head space in an otherwise low room. I think the other rooms will get the same treatment, although they are old and most likely the boards are lying directly on the beams.


Almost done. c. 9m-long oak beams exposed.
And from the other side.

The unsung hero in all this is my darling wife, who really did get the shit job this time. She's always cleaning up after me...

Sunday 22 January 2012

Beam me up

Or, up me beam, to be more accurate.

A few weeks ago, my wife arranged to get an old oak beam from a chap in the next village. Lutz (our carpenter) and I duly went over to pick it up, and man-handled 5 metres of solid oak onto his truck and then left it outside our barn. It was supposed to be installed in the living room to replace the cracked beam. Unfortunately, as Lutz was heading off on holiday, it didn't happen in time. So, Jörg and I took matters into our own hands and a few weeks ago, with the help of a chainsaw, we took the old beam out.

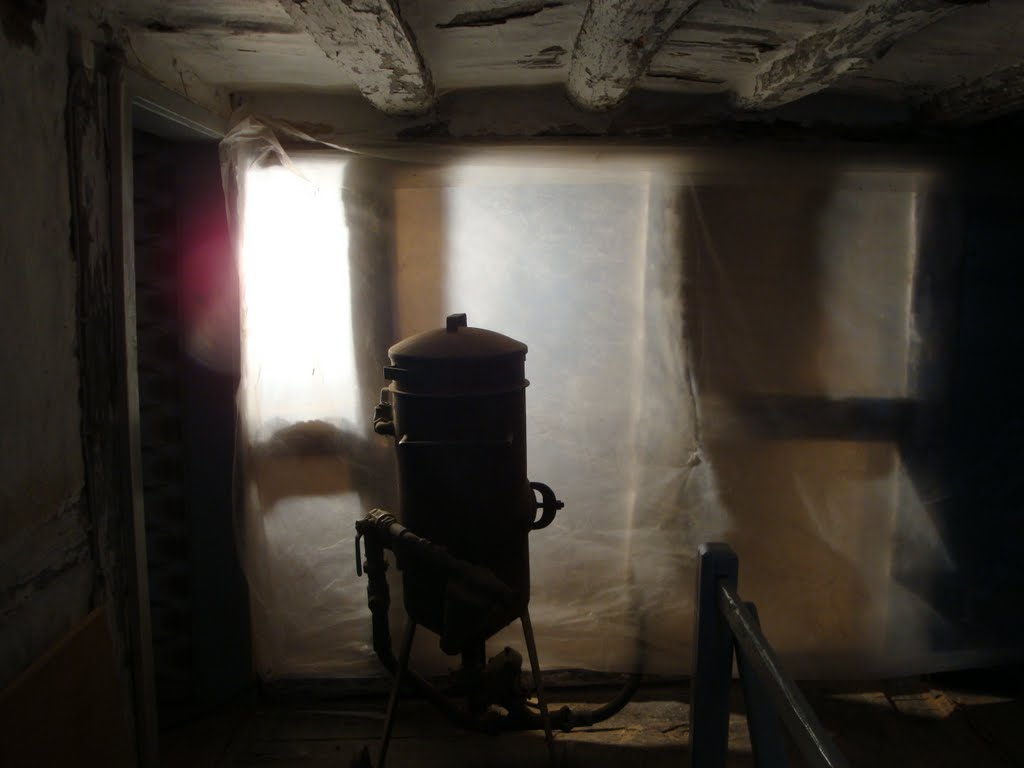
The old, cracked one, still in place (middle one)
The replacement beam was moved from outside to one of the cellars where it got a cleanup with a sandblaster and other, finer implements last week. To be honest, the beam had been worrying me, as not only was it to support the floor above, but it does have some structural role to play, as it anchors into the west gable wall. Yesterday, despite having little desire to do any work, I began preparing the sockets (well, holes in the wall) in preparation for the beam. I had no intention of going any further till Jörg arrived unannounced, which led to us asking another neighbour (who happens to be a tradesman) for a loan of a bit of scaffolding and a hand, and who brought two of his helpers with him. Within 30 or 40 minutes of them arriving we had carried the beam up to the first floor and installed it. My precision measurements were mocked, and rightly so. An experienced tradesman took over, hacked a bit with a masonry chisel, and we were done.

The professionals departing as swiftly as they arrived, Jörg and I were left to connect the beam to the iron anchor in the gable (that took longer to do due to breaking bolts!) and attempt to tie it into the beams on the other side of the room. I need a longer drill bit to finish that part, but the main thing is we have a new beam in, and I won't wake up in a sweat worrying about it any more.


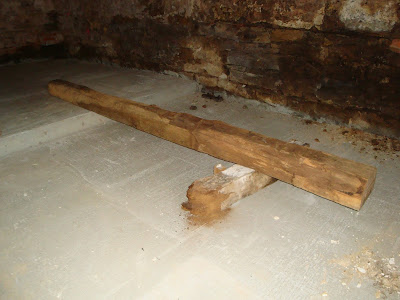
The beam, pre-cleanup.
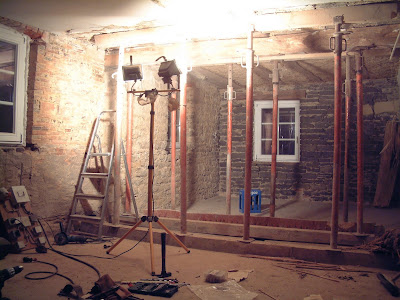
And fitted!

Anchor in the west gable, ready to be connected
Final span is 4 metres
Jörg adding some final touches.
The sockets have to be refilled and the beam wedged in, so the support struts will stay in place till that's done.

In other news: my usual camera broke, for the third time, so it's time for a new one. I had replaced the lens myself twice, after it had been dropped, but I think this time it's from dust. I don't like the colours of the photos my old backup camera takes (see above!).

Sunday 15 January 2012

Mission accomplished (almost)

Every evening this past week, till close to 11pm, I hacked the surface layers of fine clay plaster off all walls where the timber framing will remain visible, in preparation for the final push with sandblasting. Even this action made the house feel "cleaner".


The underlying rough clay plaster, covering the wattles, is fairly tough stuff, and despite a neighbour advising us to remove it all in order to make the house lighter (it's heavier than some modern materials we could use), I've no intention of removing all that stuff. New clay plaster will replace the fine coat, eventually.

The intention was to spend Saturday for one last sandblasting session, including the cellar walls to get rid of old plaster and a century of crud. Luckily, help was at hand, and my buddy Joerg poped over on Saturday to hack loose lime plaster off the cellar walls while I worked the sandblaster in other areas. I'm pleased with the results
Before blasting.
After blasting
Before blasting.
After blasting.
Cellar 4, before blasting. Ick!
Cellar 4, after blasting.
The beam lying on the ground in the cellar is a 5 metre oak beam that was salvaged from a house that burnt down in a neighbouring village. We need one to replace the broken beam in the living room (see bottom of that post), so this was a real bargain. It's now been cleaned with the sandblaster, but needs some fine sanding. It weighs a hell of a lot, so fitting it is not going to be easy.

I'm really pleased with the cellar walls,as they felt really dirty, and now they're pretty much ready for replastering (as soon as the water problem is sorted!). I also used the  opportunity to clean the sandstone frames on the doorways into the two vaulted cellars. This sand-on-sandstone action worked great! What had been hidden behind layers of pain, plaster and plasterboard cleaner up to a lovely, new/looking red sandstone.

Door to cellar 2 before blasting
Door to cellar 2 after blasting.

It also revealed a little more of the date on the lintel above the door to cellar 3. Previously, I thought the B was a later scrawl, as it looked a bit... well, amateurish. The discovery of an additional characgter makes it seems it was supposed to be there, so JB (or IB?) could be the person who owned/built the house. That is if this is an original lintel. We're tracing back records and are as far as 1860, so we'll find out eventually.

J 1840 B or I 1840 B, above the entrance to cellar 3
So, it was a good (and long) day's work. Except this morning I realised I'm not finished after all. I forgot the new post in the kitchen and a big horizontal beam by the first staircase. Maybe I'll do that tomorrow. Speaking of the new post, yesterday we noticed it was wet on two edges. Water has not been leaking in from anywhere, so it must be coming out from the wood itself. It was outdoors for some time before we got it, so maybe it's being squeezed out by the weight of the house above it! It had better be stable!
The weeping post.


Saturday 7 January 2012

More blasting

Little enough has been happening over the Christmas holidays, but any time I've had has been invested in more sandblasting. I re-blasted the stone wall in the living room after chipping out old morter, and it's now much better (sorry, no photo yet), but the biggest job has been blasting as much oak as I could in the second floor, including the old wooden attic stairs.

Lessons learned when using a sandblaster on wood: the nut shells are great, but expensive. Very fine sand (0.06 - 0.3mm) does a great job and doesn't damage the wood, especially if the flow is well controlled. In fact, in some cases this was too gentle, as smoke-stained oak is like iron. Not-so-fine sand (up to 0.8mm) is ok for rough cleaning, but the finish leaves a lot to be desired, and I wouldn't put it near soft or damaged wood. Final lesson learned, don't bother trying to recycle the blast material unless you are blasting only wood, with no chance of other matter like clay dust getting mixed in. If it does, it goes Poof!, and you can't see a damn thing.

Preparation! With new windows in, I sealed every work area.
Safety first!
And now the before and after shots (well, I'd already done the stairs when the before this was taken)!

2nd floor, west staircase, before
And after the wall beams were blasted with fine sand.
Ceiling of same area before (note boards will be plastered later).
And after.
Looking closely at the finish, it's a bit rough in spots, but a buff with the brush sander will give a nice finish.
Finish a bit rough.


Last Thursday, Lutz and I also fitted an old oak post in the kitchen. This was long-awaited, and the chance finding of a suitable post (24x24cm by 2.1m high) in a neighbour's woodpile was a good sign. It needed little adjustment, although jacking up the beam spanning the kitchen was no easy task.

Waiting for the jack.
Job done.
 Think that needs a bit of sandblasting...