Wednesday 30 May 2012

The Magnificent Seven

Seven. That's right, Seven. That's how many workers were beavering away on the building site today. It's a record. Dieter Edinger and his three co-workers were plastering like demons. Big areas are definitely easier for them, as they completed a full gable and the front of the house today. I think these walls are more or less ready for painting, which is another story. We have to pick colours for the timberwork (probably a very dark brown) and something to complement that for the plasterwork (probably an off-white like Altweiss), so there's some testing to be done.

On with the pictures, which describe what was done today better than I can.

Yesterday.
This afternoon.
This evening.
From the front.
The sandstone frames are looking distinctly grubby now, compared to all that shiny new plaster. They need a little work, and then they'll be painted a sandstone colour. I'd considered sandblasting them and leaving them natural, but they are in various states of disrepair, with patchy colours, and in some cases badly worn, so a bit of paint might help protect them.


On the west gable are several iron anchors, binding the wall to the large oak beams spanning the width of the house. As an architectural, as well as structural feature, I'll clean them up and paint them for contrast.


Meanwhile, out back, the Kispert people (that means the three guys that work for Kispert, the general builder) were staging what looked like trench warfare, digging ditches for pipes. They also installed the drainage along the back wall, part of the perimeter insulation, and a lot of work connecting a pipe for the drainage into the sewers.

The "dodgy" corner
The trenches pictured below lead to the pigsty. We're not doing anything there for quite some time, but perhaps in a few years we'll need water and electricity over there. We'll lay empty pipes to connect to the sewers (the trench on the left) and one leading from the house to take fresh water and electricity cables (the trench running bottom right to top left).

Trenches!
Some day we might have the Dirty Dozen!

Saturday 19 May 2012

Glittering walls and a fireplace

Feeling like a good job was done, as yesterday and today I finished putting up the expanded metal sheets on half-timbered parts of the east gable. Sounds like a simple job, but try hammering 3.5kg-worth of 6 and 9cm nails into old oak beams. I've a lot of respect for the strength of oak, despite cursing it every time a nail bent (more often that I liked, and drilling pilot holes only got me so far till I broke my fourth and final drill bit of the right size). So, sheets cut, nailed on, overlapped, wire-tied and holes cut for the windows. Whole gable (2.5 stories worth) done in about 16 hours. I bet a professional could have done it a lot quicker, but working solo takes time.

Spot the bent nail.
Nice and tidy.
Half-timbered part begins at eve level.

From the back. Only one patch left.
Quite nice getting the sun on this side in the morning, and a birds-eye view of the work going on down below.

Meanwhile, inside, my wife discovered what looks like an old fireplace in the living room, while hacking off loose plaster. This is right at the bottom of the chimney (hence fireplace). The thought of reopening it flashed briefly across my mind, but I'd rather not take chances with that crack above it. We'll probably install a wood stove to the right, with a new stovepipe drilled directly into the chimney. Interestingly, the position of this fireplace is exactly in line with the wall we removed. We knew this was a later wall (modern material), but the position of a fireplace here suggests the living room was always a big, open room, or at least since 1937.
Old fireplace, probably built 1937.

We know this is the case, as the current chimney position was indicated as new on a 1937 plan. The former owners told is that legend has it that the house was used as a Gaststätte (Inn), and the living room was the common room. Something we have to research, but I find it hard to believe!

The proper village Gaststätte is also under renovation, though a lot faster, and to better standards, then ours.

Zur Linde, well-insulated.
Other smaller jobs done today: finally severed the electric cables leading to the barn and cleaned up the facade a bit. The cables were rather ugly, running across the front of the house, just under the eves. The new ones will run inside the cellar, across to the barn.

Thursday 17 May 2012

Holding it together

Last Monday, I left the building site unsure about the state of the cellar walls that had been excavated, but knowing the guys would be taking action that day. They had to. The plan was to shore up the wall and pour a layer of concrete to stabilise and thicken the loose stone walls.

Step 1: add steel mesh.
Step 2: erect shuttering.
Meanwhile, another section was excavated.
While inside the wall was propped.
Step 3: Add concrete.
Step 4: wait.
Today was my first look at the results, and I have to admit, I'm fairly pleased, not least to say relieved. The new concrete wall will be painted with a bituminous resin for water proofing before perimeter insulation is added. The state of the walls previously explained why the cellar was a lot wetter than we'd like, so if nothing else, the silver lining in all this is that the cellar should be a lot drier. The step in the wall will be underground, or at least that was the plan. It looks like they made it higher than we discussed on Monday, meaning we'll simply have to make the terrace level higher, which is also ok.
The finished product.
The yellow pipe at the bottom of the frame is drainage from the pit in which the rainwater cistern now sits. This has to be drained, as if water builds up in there, and the cistern is empty, it will float, which would not be good.

The guys continued with this work over Tuesday and Wednesday, so the whole back of the house has been treated like this, though not to this depth.

More patching.
The only issue I have is that the holes left in the wall for pipes to go in and out to the cistern and blank pipes for future services to the pigsty, as well as the heatpump circuit, are all a bit close together. I wanted the heat pump circuit outlet to be far from any water pipes, as a thick ice block can build up around the heatpump pipes, and it wouldn't do to freeze water pipes going to the pig sty. We'll see what the experts say, but it wasn't according to my drawings.

Well, there's one more issue, that is worrying, and that's the unplanned costs of this work. Our budget is already extremely stretched, and this could be a serious dent, meaning I have to try to do more of the internal work myself than I'd like, or am able.

The plasterers were also about this past week, chipping out and patching up cracks in the facade plasterwork, getting ready for the next layers.


Today was a holiday, tomorrow a bridge day, so we're not expecting any workers till mid next week. Enough time for me to plan pipework in detail.

Monday 14 May 2012

Action stations!

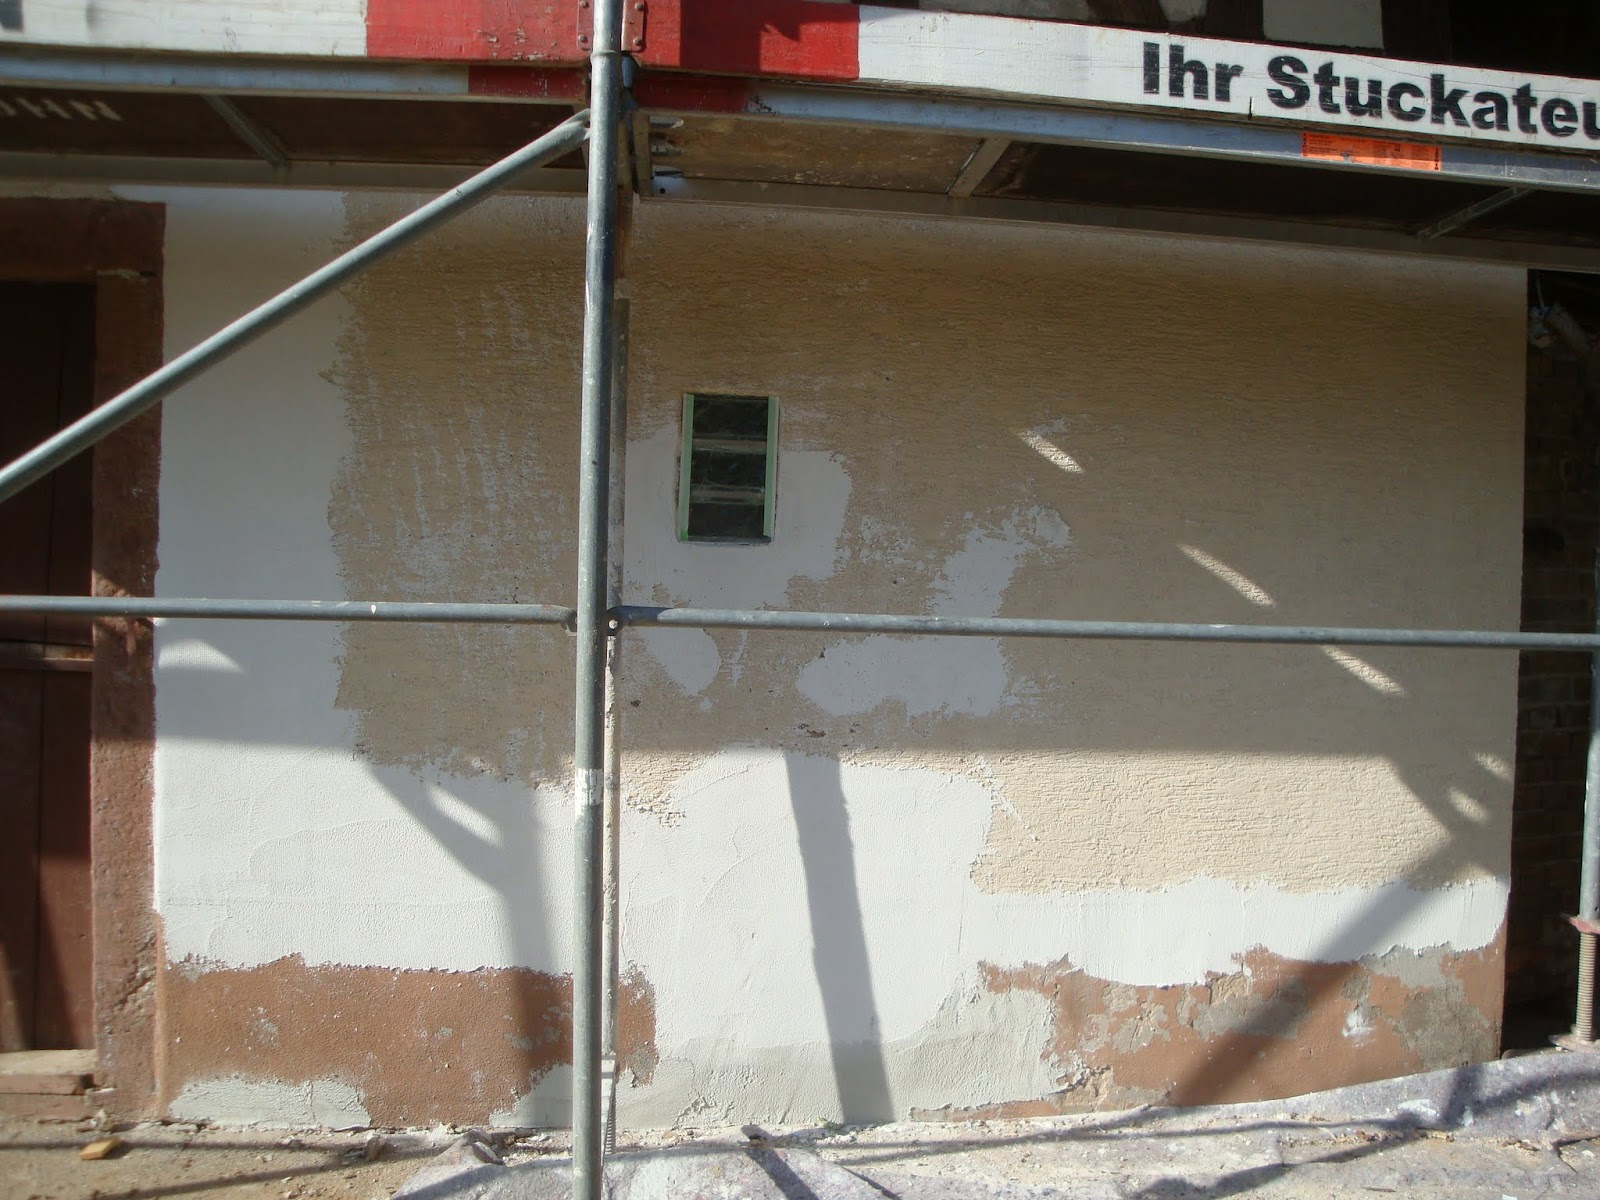
Our building site feels like it's a hive of activity at the moment, with people on the scaffolding looking after the plasterwork, and the general builders out back with big machines digging holes.

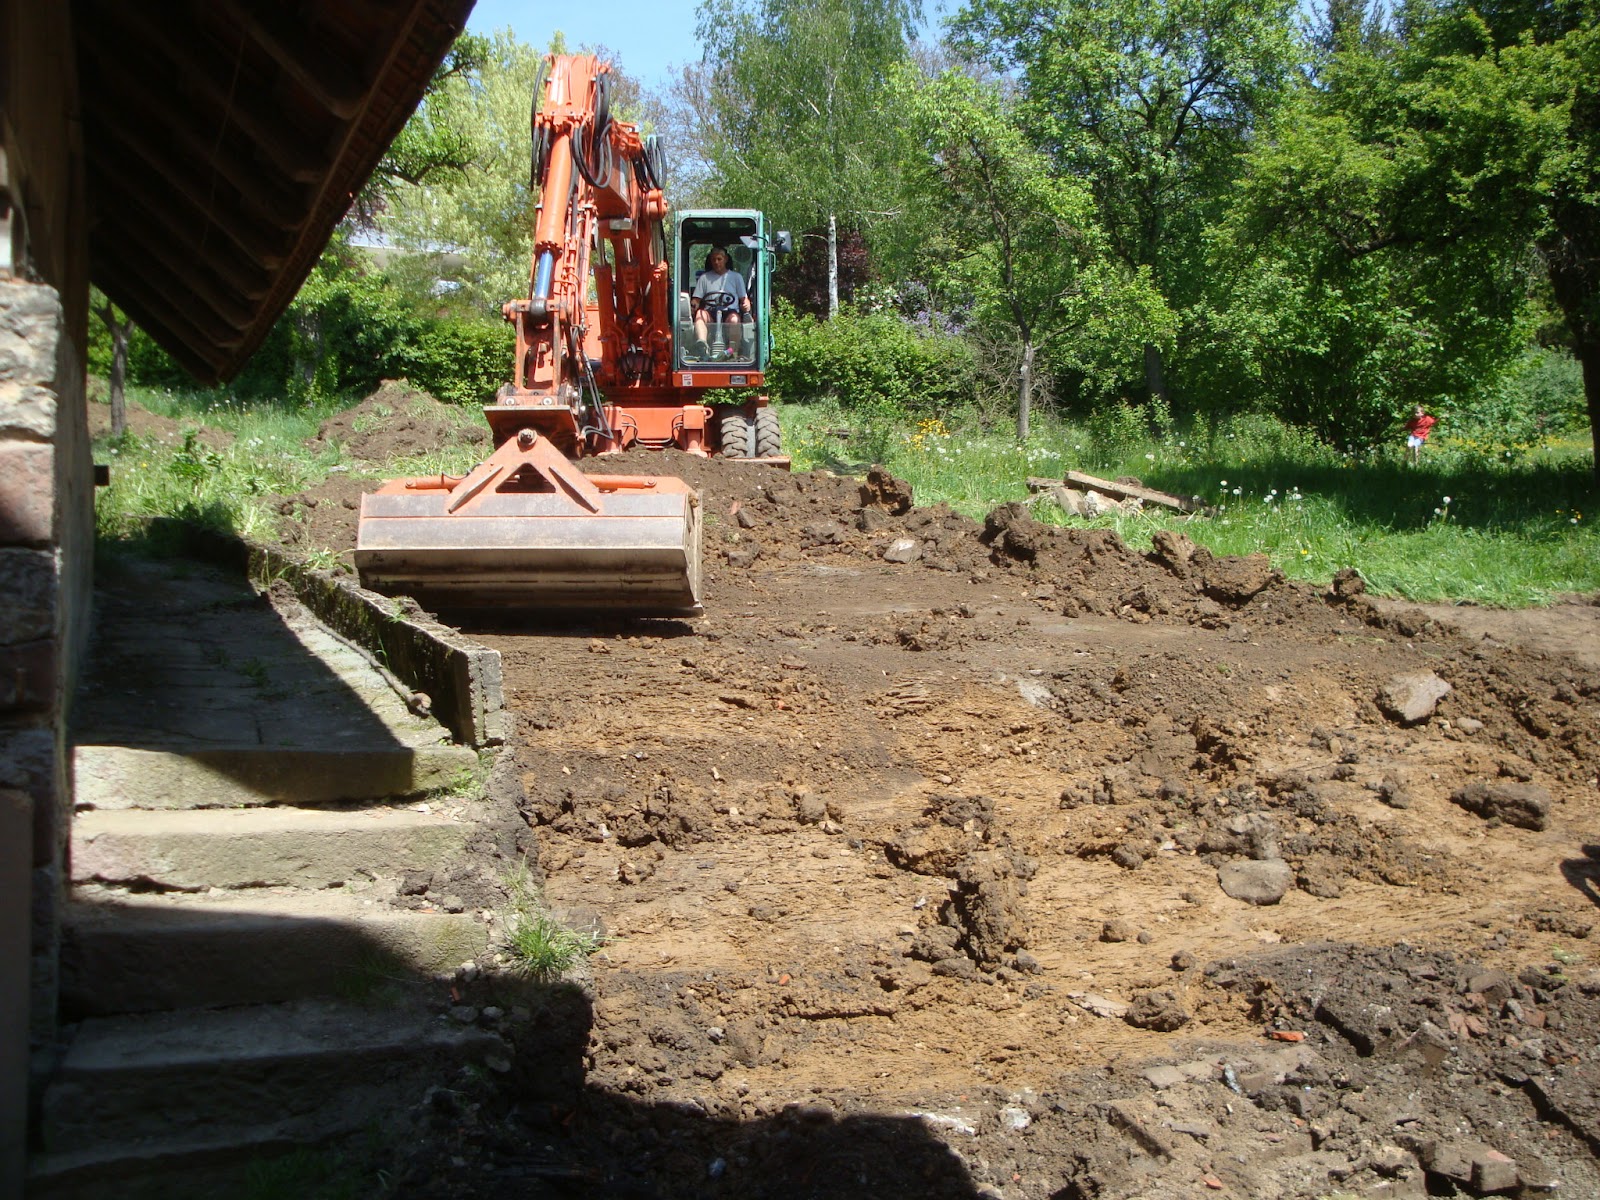
The main job for the general builder was to level out the ground at the back of the house and bury a 6,500 litre rainwater cistern.

A fair bit of earth has to be moved, as a couple of metres from the back door, the ground was about 1m higher than the ground level at the back door.

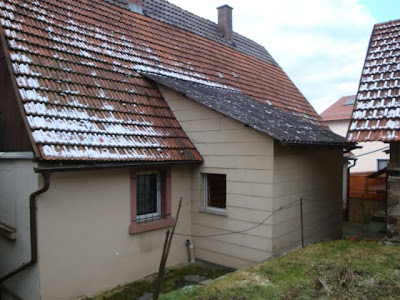
Back of the house, early 2011.

By levelling this out, we're making space for a future patio/terrace, but it'll probably be covered in hardcore stones for some time. The water cistern is large enough. Without the access shaft, it's just over 2m high, so the hole they dug was close to 3m deep. Mostly clay with some big stones, and a possible gravel layer, it was easy digging for the big excavator. The lack of boulders also bodes well for when we have excavate the field for the ground source heat pump collector area.

A little bit of levelling.

A little more.

Former ground level against pig sty

Ready to dig the big hole.

Water from the roofs of the barn, the pig sty and part of the house will flow into this tank, so that's a pretty big collection area. The overflow will be directed down to the nearby stream, as otherwise we have to pay annually for rainwater that goes into the waste-water system. Personally, we think it's goof to have some rainwater going down there, as it can flush clean the pipes, but they are the new rules.

The hole for the cistern, c. 3m deep.
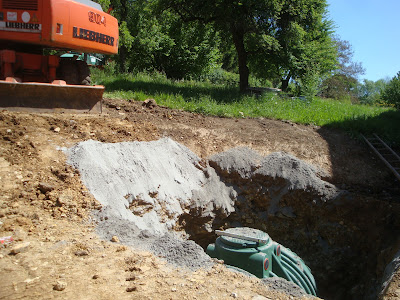
Burying the cistern.

At the same time, the general builders have to excavate a trench around the back of the house. This was primarily to install some perimeter insulation below ground level, and a splash zone half a metre above ground, as this side of the house will be insulated from the outside.They had the trench dug last Friday, so we got a first look at the condition of the external cellar walls.

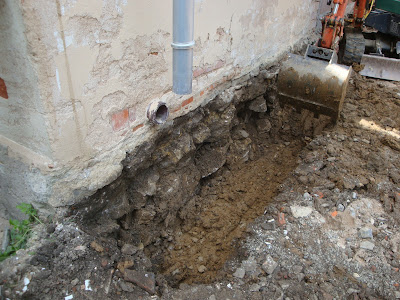
Rough, and stones falling out.

Not a pretty sight. Expecting fairly even stonework, like the inner face, we were instead faces with a broken surface, as if they had piled stones against an earth embankment before finishing with nicer stones on the inside. This would explain some of the wet issues we have in the cellar, but with the trench dug, followed by rain on Friday night, a small stream developed in the cellar. While we had planned on putting in perimeter drainage, it was clear that this would not be deep enough to stop the ingress of water, so today, they dug deeper. This exposed the frightening sight of a large undercut in the cellar wall, adding strength to our theory on how it was constructed. Of course, this needs immediate attention.

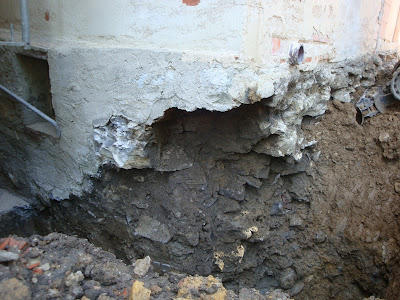
Corner undercut by at least 50cm. We need a new one!


The plan is to put up shuttering and reinforcement mesh, and pour concrete in behind the cellar wall. This will have the effect of strengthening and supporting the wall, while providing an even surface which can be waterproofed before the insulation gets stuck on. In a way, it's a silver lining. They will continue to do this along the entire ack wall of the house in 2m sections, although they cannot go deep behind the vaulted cellars, as they need pressure to keep them intact. We can live with damp there.

While this has been going on, the plasterer and crew have put undercoat on the half-timbered beams, and a base coat of plaster with mesh reinforcement on the roof dormers. After months looking at wood fibre boards and then plastic, they look great already. Today, they are chipping out and repairing cracks in the masonry walls.

Dormers with the base coat of plaster.

As for my own work, most of Saturday was spent installing expanded metal sheets on the east gable wall (the half-timbered part), as a foundation for new plaster. This plaster is simply to provide an even base onto which external insulation can be glued. It was unplanned, hence me doing that part to save some valuable cash.


First couple up. 2.5x0.6m sheets
Second row, three stories up.

One unexpected result of this work, was the discovery that one main member has completely rotted. It's a beam whose end sticks out the gable wall, and runs through one of the rooms, supporting the ceiling beams. The end in the wall was clearly exposed, so had the consistency of a sponge, providing an ideal home for a nest of ants. Replacing this beam would be a major effort, so I'm thinking of getting a steel bracket to support it on the inner wall side.

End of oak beam, totally rotten.
In the good news side, our neighbour, Sace, who will also be doing the heating work, brought along a rotating laser level to check the floor of our kitchen. The current surface is quite uneven with a peak in the middle, right above the vaulted cellars. This meant we were unsure if we could install underfloor heating. Thankfully, we have just about enough room to insulate an then install heating pipes in the floor, meaning we can save wall space.

And in other news, all the work in the garden means rescuing these beautiful creatures before they get buried. Awww...
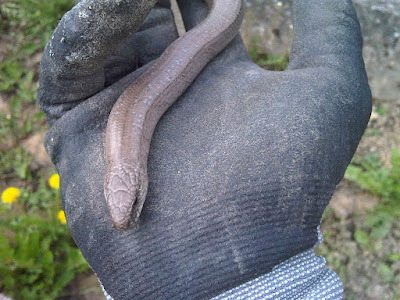
Slow worm :)

Sunday 6 May 2012

Steady as she goes

The lack of blog updates for the past month-and-a-half doesn't mean we've been relaxing with our feet up. There's been a lot of small, boring jobs done, preparing for bigger, boring jobs, but it has to be done. The longer evenings and warmer weather has certainly made it more pleasant, although rain is causing delays with two major pieces of work.

One is completing our link to the sewerage system, insulating the cellar walls along with drainage, and then digging a huge hole to bury a 6,500 litre rainwater cistern, while also creating an area for a future terrace/patio at the back of the house. Clearly it needs to be dry for all that, but the great weather we had for the past week is now gone, so the general builders missed that window of opportunity. Again.

The second major news is that we've awarded the facade work (insulation, plastering, paining) to local man, Dieter Edinger. I like that a local firm wins the business. Of course, this is pretty weather-dependent, but at least the house got a good shower with a high pressure cleaner.

Before the cleaning
And after. Loose paint washed away.
Over the past six weeks, we've continued to take out floorboards, clean up those walls that will receive plaster coats prior to installing internal insulation, and other dusty, thankless tasks


The west gable is going to be insulated from the inside. The walls are a little uneven, so it makes sense to do a base coat of plaster before sticking internal insulation boards on. Unfortunately, knocking off a bit of loose plaster turned into knocking off all the plaster, cleaning with a wire brush and then vacuum-cleaning them. But they do look nice, so here's a series of before and afters:

Living room just after plaster removal
And after a bit of a cleanup. Notice ceiling and beams cleaned
Bedroom, 2nd floor way before

And now, pretty much gutted
3rd floor, attic room, near the pointy bit.
Also more or less empty, but the wall looks great.
The south-facing walls, which are the only half-timbered walls staying exposed externally, must also be insulated from the inside. I'm opting for a solid construction, where we'll plaster the internal wall with lime-based plaster, which is breathable, followed by wood-fibre insulation boards. However, this does need quite some prep work to clean off the panelling between the timber frame, patching up where required, then installing expanded metal mesh to span between the beams and the infill panels in order to reduce cracking in the plaster.

West hall during plasterboard removal (with old window)
East hall after plaster removal (with new window)
East and west after cleaning and expanded metal sheets.

Our planned bedroom after plaster removal.